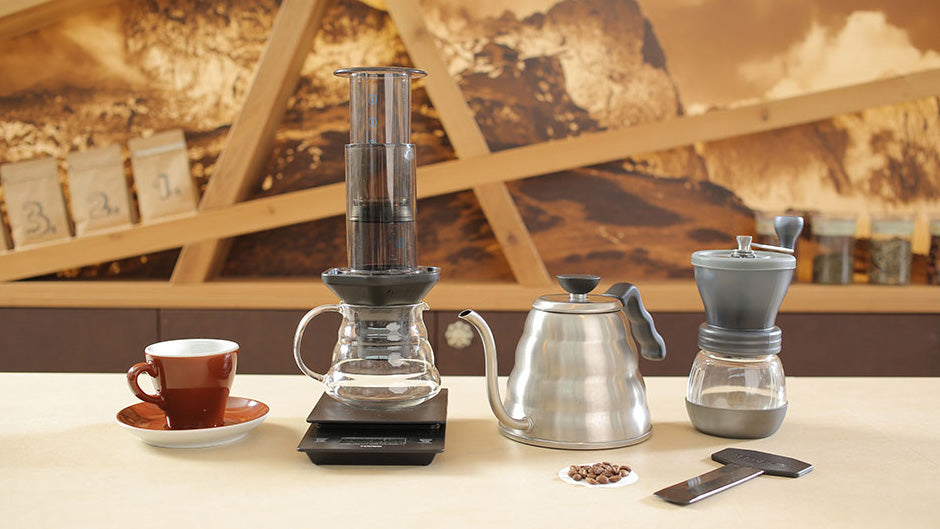
Flying toys and coffee go together like... well, how? I really can't think of anything. But it is what it is: one of the most popular coffee preparation methods, the AeroPress, was developed by Alan Adler, the inventor of the Aerobie, a type of Frisbee. And excitingly, the new coffee preparation method has hit the scene like a comet. The AeroPress came onto the market in 2005 and there have been world championships with the coffee maker since 2008. Here you can find out everything about the AeroPress and the coffee you can make with it.
AeroPress Coffee – History of the AeroPress
Alan Adler is an American inventor and professor. He is best known for his inventions of aerodynamic toys. Such as the Aerobie, which is a flying ring similar to a Frisbee. One distinguishing feature from the Frisbee is its lower mass and therefore more stable flight. In total, Alan Adler holds around 40 patents in the field of aerodynamics and optics. And one day - in the early 2000s - the inventor was so dissatisfied with his daily coffee that he began to develop his own method of preparing it: the AeroPress.
AeroPress coffee – less acid
Alan Adler began developing the AeroPress in 2004. His intention was to have less acidity and bitterness in his coffee. He had already tried many different methods of preparation - espresso maker, hand filter and French press - and was always dissatisfied with the limited options for influencing the preparation parameters. The brewing time, water temperature and grind size were not optimal enough for him and his coffee taste with the other methods. So he simply built an Aeropress prototype in his garage.
The AeroPress consists of a cylinder made of translucent material, today it is polypropylene, and a piston with an airtight silicone ring. In effect, it is like a syringe, except that a filter cap is screwed onto the end of the chamber to hold the paper filter placed there.
AeroPress coffee – success across the board
After only a short period of development, the AeroPress was presented to the public at the Coffeefest in Seattle, USA in 2005. And then it began its triumphant march among coffee lovers. AeroPress fans praised and continue to praise the flexibility and consistency in brewing coffee. Since 2008, there have even been the AeroPress Championships, a coffee competition that is all about making coffee with the AeroPress. In 2018, more than 3,000 people took part in the competition.
AeroPress Coffee – How to AeroPress

Preparing coffee with the AeroPress is not complicated. We will explain the process to you step by step.
- grinding coffee
- Boil water
- Place filter paper in filter insert and rinse
- Screw the filter lid onto the cylinder, place the cylinder on a cup or jug
- Add coffee and then hot water to cylinder
- Insert the plunger and press down
This is how the coffee is prepared, as with the pour-over method. However, there is also another – often more common – method: the so-called “inverted method”.
AeroPress Coffee – Inverted Method
As mentioned, there is also the "inverted method". Here the coffee is prepared using the full immersion method, as with the French press. In the coffee scene, this method is even more common than the original method.
The cylinder is fitted with the plunger at the beginning and placed upside down on a stable surface. Then you fill in coffee and water and stir. Now you put the filter cap on, wait a moment and then turn the AeroPress over. Then you press the plunger down and the coffee runs into your cup or pot.
AeroPress coffee – original recipe by Alan Adler
By the way, the inventor himself has also developed a recipe. You can find it inside every AeroPress packaging. According to the inventor, the coffee should be ground like an espresso, i.e. quite finely, and the water temperature should be between 80 and 85 degrees Celsius.
- Then place the filter paper in its place and screw the filter holder onto the AeroPress.
- You place the cylinder on a cup and fill it with a measuring spoon (included) of coffee. That's about 15 grams of coffee.
- Fill with water up to mark 1, which should be about 85 to 90 milliliters.
- Stir coffee and water for ten seconds
- Place the plunger on top and press it down (the inventor recommends simply placing your hands on the plunger and moving it downwards using your own weight).
What comes out of this is a fairly strong coffee concentrate, which you can dilute with hot water as desired.
AeroPress coffee – cleaning
The AeroPress is also extremely easy to clean. Once you have unscrewed the filter attachment, you can simply use the plunger to press the filter and coffee residue out of the bottom. Then you just need to rinse the parts so that no coffee residue dries.
 AeroPress Coffee – All Parameters
We also recommend grinding the coffee fresh for the AeroPress. However, you can also order your favorite coffee from us ground for the AeroPress (and for other preparation methods). The grind for the AeroPress should be between fine and medium; if you are unsure, grind finer rather than too coarse. The ground coffee should feel like table salt.
The amount of coffee should be around 14 grams per 200 ml of water. There are also recipes that use 16 to 17 grams per 200 ml. The great thing about the AeroPress is that you can experiment and ultimately develop "your" recipe.
When it comes to water temperature, you can basically follow filter coffee recipes and assume around 90 degrees. Sometimes a little more, sometimes a little less.
And don't forget: With a special attachment, such as the Prismo from Fellow , you can also prepare espresso with the AeroPress.
AeroPress coffee – which coffees are suitable?
Basically, you can use any roast level you want in the AeroPress. As already mentioned, you can also make espresso with an attachment. Otherwise, the AeroPress is more in the category of French press and filter coffee. In this respect, we recommend a medium or even light roast . When choosing, you should therefore listen to your personal taste. In general, the aroma of light roasts is more floral, fruity and light. Dark roasts have a more intense taste and have more roasted aromas.
AeroPress Coffee - Espresso Recipe
What you need: 18 grams of dark roast / 90 milliliters of hot water
- Place the filter paper in the filter lid and rinse it
- Put the piston in the cylinder and turn the whole thing (inverted method)
- Fill in the (freshly) ground coffee (it should be ground a little coarser than for a portafilter espresso)
- Pour the entire 90 milliliters
- Stir water and coffee
- Screw on the filter cap
- Turn the AeroPress over, place it on a cup and press the plunger down
This can also be done without the extra attachment from Fellow, but if you like using the AeroPress and like espresso, you might also consider the attachment.
AeroPress Coffee - On the Go

One of the best features of the AeroPress is its simplicity. It consists of just a few parts and is very light. This makes it suitable not only for your daily coffee at home, but also for enjoying coffee on the go: when traveling, camping, on mountain tours, etc. It fits in any backpack and even in your handbag. You just need to take coffee (powder) and hot water with you or find some on the way.
AeroPress Coffee - Conclusion
The AeroPress is ideal for anyone who likes to experiment or wants to enjoy good coffee on the go. You can use it to make filter coffee, concentrated coffee and espresso. It consists of just three parts and is very easy to clean. What you get is a good method of making aromatic, low-acid coffee - and of course lots of fun experimenting so that you can eventually develop "YOUR" recipe.


